Table of Contents
How To Add Amazon Affiliate WordPress Plugin Free For Affiliate Products?
Hello friends, today we will discuss How To Add Amazon Affiliate WordPress Plugin Free For Affiliate Products?
In fact, more money can be earned from e-commerce websites than from AdSense, by selling affiliate products.
So if you want to show up on Amazon’s own website, you need to use some plugins.
And how to use the plugins.
Benefits of Amazon Affiliate WordPress Plugin
1st Benefit – If you want to sell Amazon’s products through your own website.
In that case, you can use the plugin.
Then all the products on your website look like Amazon’s product pages.
That’s exactly what your website will look like.
Resulting in yours.
2nd Benefit – Since you are getting affiliate links from Amazon, the authority of your website will increase a lot.
3rd Benefit – You do not have to provide separate images or descriptions for each product.
Using this plugin, you will automatically get a separate description for each product.
4th Benefit – Normally since you are selling Amazon affiliate products, you do not need a separate investment or storeroom.

Rules of Amazon Affiliate Plugin Use
If you want to connect to the WordPress website through a plugin, there are certain things you need to keep in mind.
No 1 Rules – You get auto descriptions for each product, I would say you modify each description at least a little bit, that is, you review the product yourself. Some of the information you understand about the product is good or bad. Is that what you update your product description.
2nd Rules – The second is that before using the plugin, you need to stall the WooCommerce plugin and make the necessary settings.
Click on the link below to learn how to use the eCommerce plugin.
How To Add Amazon Affiliate Products To WordPress Through Plugin?
Anyway, at least I didn’t go down without explaining myself first.
Amazon Affiliate WordPress Plugin Free
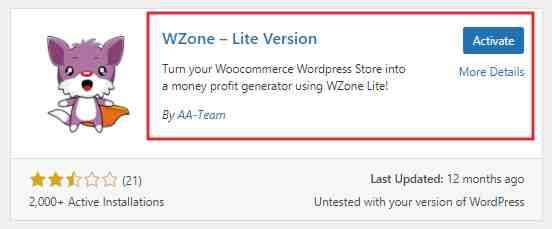
1st Step – First you have to go website dashboard. Go to Add New Plugin section. Search Woo Zone. Install & Activated this Plugin. After Woo Zone Plugin Activation next Woo Zone page will be open.
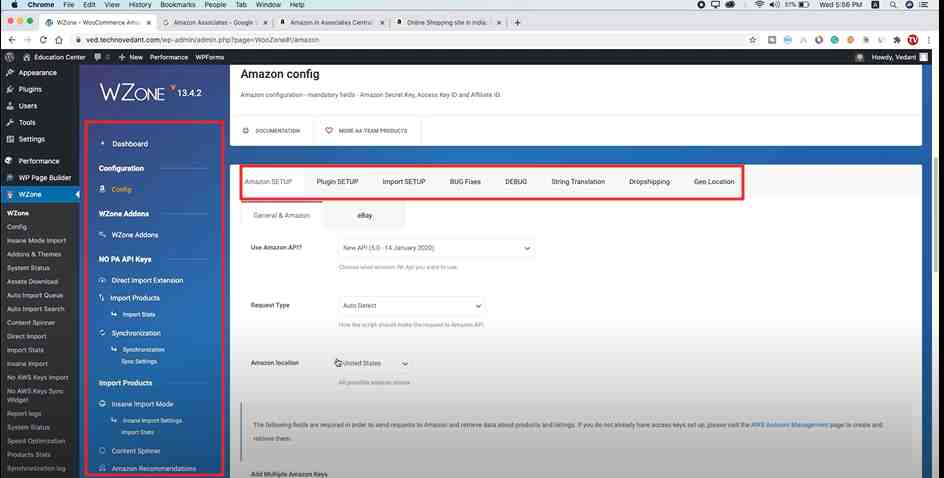
2nd Step – Now click on Configuration Page. You have to change some settings on this page.
Click on Amazon Setup > Amazon Location > India
If you Belong to Other County, Then select your country.
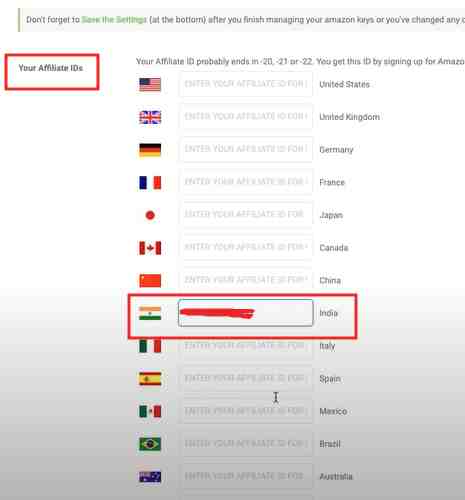
Now scroll down. Below you will get Countries name or Countries Flag. There you have to add Amazon Affiliate ID.
I hope you already have an Amazon Affiliate Account. If not available, then click on the below link, where I have described how to create Affiliate Account.
Amazon Affiliate Account
You can get Amazon Affiliate ID or Store ID from your Amazon Affiliate Account. Copy this ID & paste it near Countries name or Countries Flag(India).
Now again scroll down select the main affiliate id – India.
Save all of these settings.
3rd Step – Go Above is After Amazon Setup next option is Plugin setup. But ignore it, Because the Plugin setup is already ok. Next page Import Setup. Scroll down below you get a prices setup option – Amazon QR other Sellers(get the lowest Price).
At the end save settings.
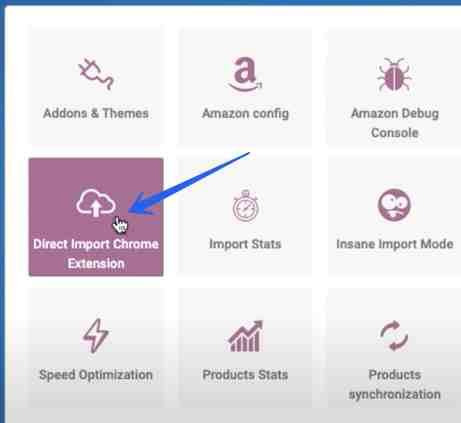
4th Step – This Step is very important. Go to Woo Zone Dashboard Click – Direct Import Chrome Extension.
The next page will be open, Scroll Below. 2 options will be shown.
API URL – Enter your website URL
API SECRET – Click on Generate New KEY. New KEY will be Generate. Copy KEY. Now save this setting.
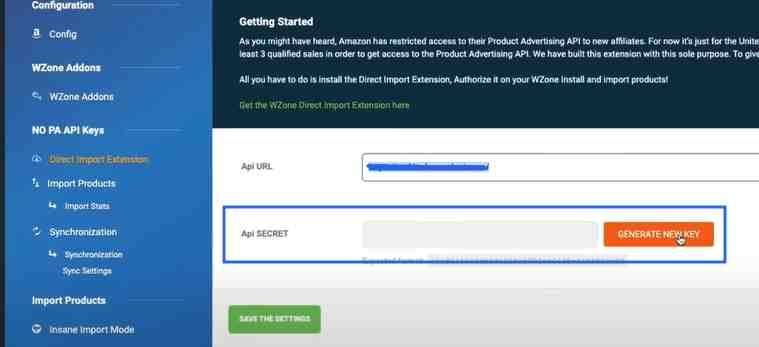
Then you will receive a notification – Get the Wzone Direct Import Extension here. > Click it.
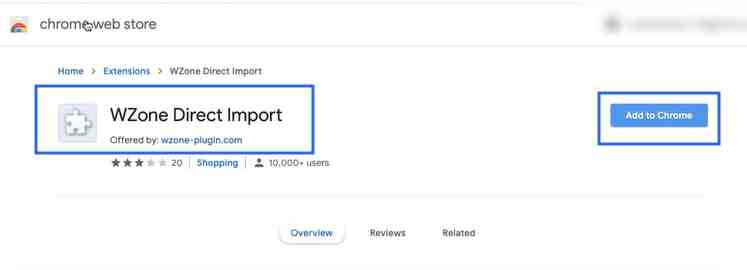
5th Step – Next this link redirects to a google extension. Extension name – Wzone Direct Import. Now add to Chrome and Install Wzone Direct Import.
Now back to Wzone dashboard & Refresh.
Do you want to Authorize WZone Import Extension to Access & Import Products into the Wzone Install? – Authorize
Click on Authorize button.
You will get Message – Website Successfully Added.
6th Step – Refresh WZone Dashboard. Click on Import Product.
Now go to Import Data. there your website will be shown. Just Add API Secret KEY, then click on UNLOCK NO AWS KEYS IMPORT.
The next page will be open select your country & save.
7th Step – On task is to add amazon products to your website. Log in to your Amazon account, choose a product that you have to add to your website, & click Wzone Direct Import Extension (That you have added on google chrome).
Within a second your select product will be added to your website.
Now how can you check?
Go WZone Dashboard, CLick on All Products, there your select product will be shown. Also, you can refresh your website & check.

If you need to learn about Share Market Analysis Course, you’ll be able to be a part of our Share Market Analysis Course.
I’ve added the detailed hyperlink of the course under.
Join Stock Market Technical Course
Last Phrase
I hope you want my article “Time Value Of Money In Financial Management” Your information has elevated rather a lot. If this text is inaccurate or you’ve gotten a query, be at liberty to go away a remark within the remark field and I’ll attempt to reply your query as quickly as potential.
Some Important Articles
- How To Get SBI Kiosk Banking (Mini Branch or CSP) From Sanjivanivf
- MACD Full Form, MACD Indicator How To Use, MACD Crossover Screener
- How To Get Free Sure shot Intraday Tips For Today
- What Is Stop Loss In Share Market, Place Stop Loss Order, What Is Stop Loss Hunting
- Best RSI Settings for Intraday
- Your Site Is Running An Insecure Version Of PHP (7.2.34) How To Update?


